How do I edit the End of the Selected-Segment with the Blend-Point Editor?
VIDEO
Motion Tutorial 4: Edit end of Selected-Segment
KEY-NOTE: The Blend-Point Editor ... Can edit the motion-values at the: •Start of the Selected-Segment •End of the Previous-Segment The Blend-Point Editor ... Cannot edit motion-values at the: •End of the Selected-Segment ! To edit the motion-values at the End of the Selected-Segment: 1.Click the Next-Segment! The Next-Segment is now the Selected-Segment, Now you can use the Blend-Point Editor to edit the END of the Previous-Segment |
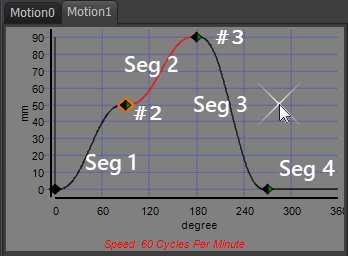
 Selected-Segment: Segment 2 |
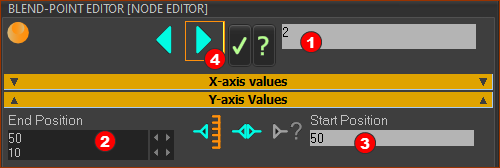
In the motion-graph above: •I have added #2 and #3 to indicate the Blend-Point numbers at the start and end of the Selected-Segment. •I have added Seg 1, Seg 2, Seg 3, and Seg 4 to indicate the Segment numbers. We want to edit the Position value of Blend-Point #3 - which is at the end of the Selected-Segment. Start the Blend-Point Editor. Blend-Point Editor: Selected-Segment - Segment 2 At the top of the Blend-Point Editor dialog, you can see 2 You can also see that you can edit the: •End-Position •Start-Position Thus, you can see, that you cannot edit Blend-Point #3 when the Selected-Segment is Segment 2. To edit Blend-Point # 3, you must make the next-segment (Segment #3) the Selected Segment. |
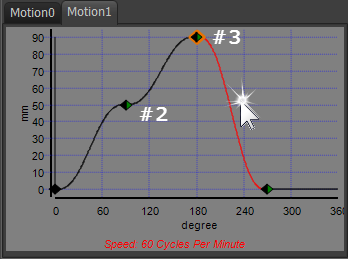
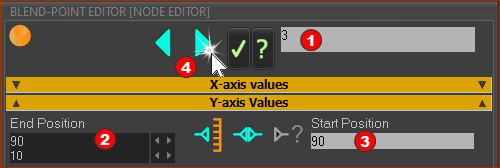
Make Segment 3 the Selected-Segment Selected-Segment: Segment 3 1.Click above or below the Next-Segment - see image above or 2.Click the Next Segment The motion-values in the Blend-Point Editor change immediately - see image below. Now, we can edit Blend-Point #3 with the Blend-Point Editor.  Blend-Point Editor: Blend-Point #3 |
