Step 1.1: Add a New Mechanism-Editor

<< Click to Display Table of Contents >>

Navigation:  Getting Started Tutorials - MechDesigner > Tutorial 1: Add a Part that Rotates - a Crank >

Step 1.1: Add a New Mechanism-Editor

Objective of Step 1.1

To add a new Mechanism-Editor.

Also, to:

use different methods to Spin/Rotate the view of the model

review the elements and symbols in the Model-Editor

review the Command-Manager

review the elements and symbols in the Mechanism-Editor

use the Rename dialog

Important:

The Add Mechanism command in this context is to add a new Mechanism-Editor.


Video

Tutorial 1: STEP 1.1 Add a Mechanism-Editor


Spin the View to see the Planes

The default view is the Front-View. When you spin the View you can see and select different elements that you cannot see from the Front-View.

There are different methods to Spin the view:

To rotate the view with exact values, we use the arrow-keys on your keyboard (recommended).

1.Move your mouse-pointer to the graphic-area

2.To rotate by 10°, use GST-LeftArrow , GST-RightArrow , GST-Uparrow , GST-DownArrow

3.To rotate by 90°, use SHIFT+GST-LeftArrow , GST-RightArrow , GST-Uparrow , GST-DownArrow

4.To rotate by 30°, use CTRL+GST-LeftArrow , GST-RightArrow , GST-Uparrow , GST-DownArrow

or

1.Click View menu (or View toolbar)  > Zoom | Spin

2.Drag with your mouse-pointer in the graphic-area

or

1.SHIFT+DRAG with your mouse-pointer.

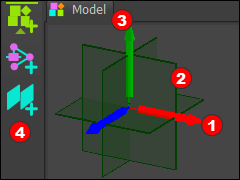
GA-NewModel

In the image you can see:

Red-14-1b Red, Green and Blue arrows, that are in the X-Y-Z-axis directions.

Red-14-2 Three fixed Planes

Red-14-3 Model name-tab

Red-14-4 Model-elements toolbar

Add a Mechanism-Editor

The Add Mechanism command adds a new Mechanism-Editor.

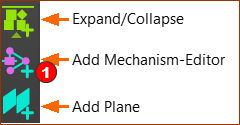
Model Toolbar

Model-elements toolbar

The Model-elements toolbar is to the left of the graphic-area.

STEP 1: Start the Add Mechanism command

GST-Icon-AddMechanism

1.Click Model elements toolbar > Add Mechanism Red-14-1

or

1.Click Add menu > Add Mechanism

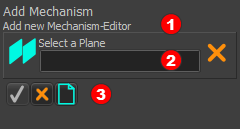
Command-Manager for Add Mechanism command

Command-Manager for Add Mechanism command

The Command-Manager, to the left of the graphic-area, changes.

Red-14-1b The command name with a simple description

Red-14-2 A selection-box with a hint above

Red-14-3 GST-TICK-GRAY-24X26 Gray before you select the elements

Red-14-3 GST-TICK-GREEN-24X26 Green after you select the elements

Red-14-3 GST-CANCEL-24X26 Cancel the command, GST-CLEAR-24X26 Clear elements from the selections-box

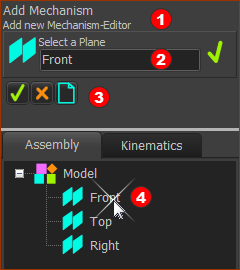
Plane in Assembly-Tree

Plane in Assembly-Tree

STEP 2: Select a Plane

1.Click a Plane in the graphic-area

OR

1.Click a Plane in the Assembly-Tree Red-14-4

The Plane is in the selection-box in the Command-Manager.

STEP 3: Complete the Command

1.Click OK-tiny-13-17 Red-14-3 below the selection-box in the Command-Manager.

OR

1.Right-click the graphic-area.

Result:

You jump to the new Mechanism-Editor.

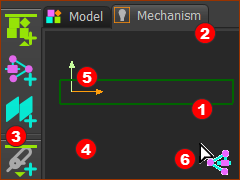
The new Mechanism-Editor

The Mechanism name-tab is new.
The new Mechanism-Editor

The new Mechanism-Editor

The new Mechanism-Editor

Red-14-1b The Green rectangle is the symbol for the Base-Part.

The Base-Part is the frame that is fixed relative to the XY-axes of the new Mechanism-Editor.

Red-14-2 The Mechanism name-tab is at the top of the graphic-area

Red-14-3 There are new toolbars to the left and right of the graphic-area

Red-14-4 The graphic-area

Red-14-5 The X-axis and Y-axis of the Base-Part are also the origin of the Mechanism-Editor.

Red-14-6 The mouse-pointer changes to indicate the Mechanism-Editor is the active editor.

Optionally: Rename the new Mechanism

It is usually good practice to rename elements. There are many methods you can use to Rename an element. Here we will open the Rename Element dialog from the Assembly-Tree.
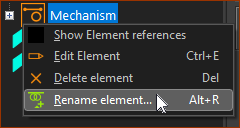
Contextual menu

Contextual menu

Open the Rename element dialog from the Assembly-Tree

1.Explore the Assembly Tree to the left of the graphic-area

2.Find the Mechanism element as a child to a Plane

3.Click Mechanism element one-time

The Mechanism element should be blue.

4.Right-click Mechanism element

In shortcut menu.

5.Click Rename element

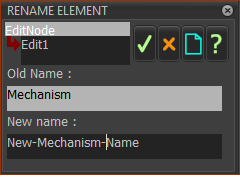
The Rename element dialog opens. The Old Name is “Mechanism”. It is read-only.

6.Enter a name in New Name

7.Click OK-tiny-13-17 to close the Rename element dialog.

8.Save your model: File menu > Save

Rename dialog

Rename dialog