Rename Elements
When models are more complex, it helps to rename elements.
After you rename an element, you can identify the element-type from its icon in the Assembly-Tree. Also, if you select the element, the icon is to the left of the element's name in the Selection-Window.
There are three(3) methods to rename an element:
METHOD 1: Name the Element with its dialog
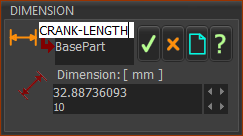 STEP 1: Open an element's dialog
Unfortunately, not all element-types have a dialog with which you can rename the element. |
METHOD 2: Rename elements in the Element-Explorer
STEP 1: Do the Windows® method
Unfortunately, not all element-types are in the Assembly-Tree. |

METHOD 3: Rename dialog
This method applies to all elements you can click in the graphics-area, Assembly-Tree, Geometry-Tree, and Kinematics-Tree. STEP 1: Open the Rename dialog
The Rename dialog is now open. STEP 2: Enter a New Name to replace the Old Name
|

