Scrolls and Feed-screws
Typically, a Scroll regulates free-flowing 'packs'* that on a conveyor, into pockets on a rotating Star-Wheel, at the in-feed to a rotary machine.
Usually, at the entry to the scroll the packs are adjacent to each other. The scroll accelerates the packs so that they match the pitch of the pockets on the star-wheel.
It is also possible to rotate the packs about their vertical axis as they move along the scroll.
* A 'pack' is a product, typically a bottle. It is assumed its shape is approximately rigid and prismatic. Its section can be anything from Rectangular to Circular. There should not be 'concave' sides to the Pack, for example a handle. If the Pack has a concave side, then re-draw the pack to remove the concave faces with a single line or arc.
This Tutorial:
1.Prepare the model to add a Scroll
2.Use the Scroll dialog to configure the Scroll ready for export to SOLIDWORKS.
3.Export the 3D-Cam to SOLIDWORKS® .
 STEP 1: Pack: Shape and Motion-Points
The Pack moves along a line that is parallel to the scroll's rotation-axis. It is also possible to rotate the Pack on its own axis as it moves from the entry to the exit of the scroll. |
|
|
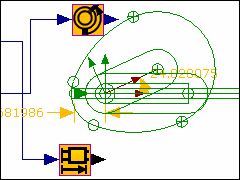
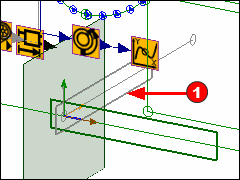
1.Add a Mechanism to a 'Plane' - the 'Front' Plane - in the Model-Editor. 2.Rename the Mechanism-Editor to 'Pack'. In the new Mechanism-Editor: 3.Add a Slider with a Motion FB for the Pack's axial motion (Define the Linear Motion of the Pack in Step 4) If the Pack rotates about an axis normal to the Pack Mechanism-Plane (graphics-area) as it moves along the scroll: 4.Add a Rocker to the Slider, with a Motion FB for the Pack's rotation (Define the Rotational Motion of the Pack in Step 4). 5.Add the Pack shape to the Slider or Rocker, as appropriate. The Pack's shape must be a sketch-loop. |
Motion-Path, Motion-Points. |
|
|
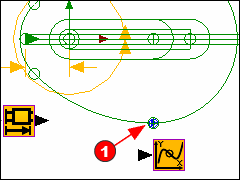
In order to calculate the shape of the scroll, we must define the contact points between the Pack and the Scroll. Rather than a Profile, we add Motion-Points to the shape of the Pack. Each Motion-Point will define a 'Rim' along the scroll - as we will see. 1.Click Add Motion-Path 2.Click one of the sketch-elements that give the shape to the Pack One Motion-Point |
|
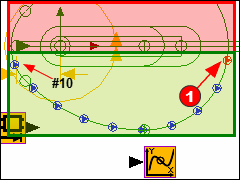
1.Double-click the Motion-Path FB to open the Motion-Path dialog In the Point parameters separator: 2.Edit the 'Phase-Offset' or 'Linear-Offset' to position the Motion-Point approximately as indicated by 3.Edit the '# Motion-Points' to 10 - we can edit this number later, if necessary. 4.Click the 'Re-generate Motion-Points' button. 5.Edit the 'Range', or 'Linear Range' to ~160º (degrees) - so that the Motion-Point #10 is approximately horizontal with #1. All 10 Motion-Points must be in the 'Green Zone' (see sketch to the left). The Motion-Points cannot be in the 'Red Zone'. If they are in the Red-Zone, the scroll will need to 'wrap' around the bottle, which is not physically possible. |
A Motion for the Motion-Points |
|
|
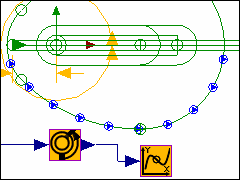
As the Pack rotates, we must also rotate the Motion-Points in the opposite direction so that they remain in the half of the Pack that faces the rotation-axis. 1.Connect a wire... •...from the output-connector of the Motion-Dimension that rotates the Pack... •...to the input-connector of the Motion-Path. You may need to add a Gearing FB, with a ratio of -1, to move the Points in the negative direction. |
 STEP 2: Add rotational cross-section and rotational axis to represent the Scroll-Blank.
|
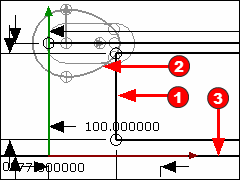
(Note: I have rotated the Pack by 180º on the rotating Part. This helps later.) We must add a sketch-loop that represents the rotational cross-section of the scroll. 1.Edit the Base-Part 2.Click Tools menu > Show/Hide other Mechanism Sketches - this will show the shape of the Pack 3.Add a rectangle The rotational cross-section needs a rotational axis. At this point, its length is not too important. 4.Add a Horizontal Line This should be along the X-axis of the Base-Part. |
|
We must also add a Profile to the rotational cross-section 1.Close the Part-Editor 2.Add Profile When we send the rotational cross-section and rotational axis to SOLIDWORKS, SOLIDWORKS makes a 'revolved-section'. It represents the Scroll-Blank. |
 STEP 3: Add a Plane, Mechanism, and the Scroll Part
We will add the scroll to a different Mechanism-Editor. We must add a new Plane for the new Mechanism-Editor. The Plane to which we add the new Mechanism-Editor must be orientated in a particular direction. If the Plane is not in the correct orientation, we will not be able to add the scroll. |
|
Add the new Plane |
|
|
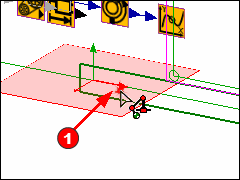
1.Spin the model with your keyboard arrow keys 2.Click Add Plane 3.Click the arrowhead of the X-axis at the Origin of the Base-Part The image shows the default position of the new Plane. We will use the Add Plane dialog to change the orientation of the Plane. First, close the Add-Plane dialog, and 'Add a new Mechanism' to the Plane, and then edit the Plane for the new Mechanism later. |
|
4.Click OK to close the Add Plane dialog 5.Click Add Mechanism 6.Click the new Plane 7.Click OK in the Command-Manager You will 'jump' to the new Mechanism-Editor. Rename the new Mechanism-Editor to 'Scroll' 8.Click the 'Pack' Mechanism name-tab at the top of the graphics-area to return to the Pack Mechanism-Editor. 9.If necessary, click Tools menu (or toolbar) > 'Show Sketches in Mechanism' You can see the new Plane and its Base-Part |
|
10.Edit the new Plane. To open the Plane dialog - double-click the new Plane in the graphics-area, or navigate to it in the Assembly-Tree. MechDesigner Rules - relative orientation of the new Plane with respect to the orientation of the Pack's Mechanism Plane. •The Z-axis of the Scroll Mechanism Base-Part must be co-axial with the X-axis of the Pack Mechanism's Base-Part •The Y-axis of the Scroll Mechanism Base-Part must be co-axial with the Y-axis of the Pack Mechanism's Base-Part In the Add Plane dialog: If you added the new Plane to the X-axis, then the X, Y and Z-axis rotations in the Plane dialog are 0,90,0 respectively. If you added the new Plane to the Y-axis, then the X, Y and Z-axis rotations are 0,90,90 respectively. The image shows the new orientation of the Base-Part and Mechanism-Plane of the 'Scroll' Mechanism. |
|
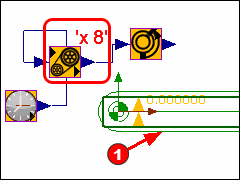
11.Click the Scroll Mechanism name-tab We will now add the Part to represent the rotating 'feedscrew'. 12.Add a rotating Part The origin of the Feedscrew is at the origin of the Base-Part. We rotate the feedscrew many times as the Pack moves from its infeed to its exit points. 13.Add a Gearing FB Edit its Gearing Ratio parameter to '8' (first guess). Rename the Gearing FB to 'x8' Note : We use the Gearing Ratio parameter to calculate the linear motion of the Pack. |
 Step 4: Define the Motion of the Pack
The Motion for the Axial and Rotation of the Pack |
|
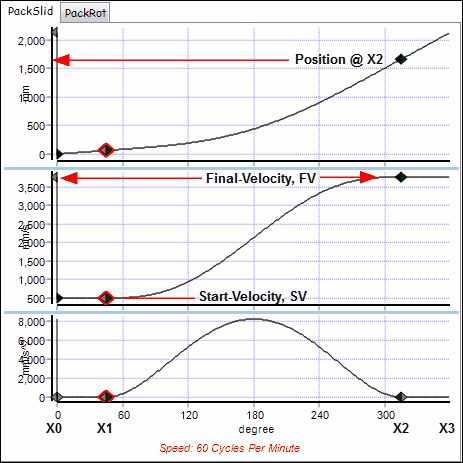
Pack Axial Velocities The motion usually has a 'Constant Velocity Segment' as its first and last segment. Thus, there are two velocities we must consider. Start Velocity: (VS) Packs are usually adjacent ('bunched up', 'back-to-back'). Thus we must move the pack by one 'Pack-Length' as we rotate the pack one time. My Pack length is 62mm, and the Gearing Ratio (G) = 8 (See Step 3). VS = Product-Length × G VS = 62 * 8 = 496 mm/s Final Velocity: (VF) Packs should be at the same pitch as the star-wheel or circular pitch of the Rotary Machine. Number of Starwheel Pockets = N, Starwheel Radius = R. Say N = 4 and R = 300mm VF = Starwheel-Pocket Pitch × G. VF= (2ΠR/N) * G = 3770 mm/s VF= (2Π300/4) * G = 3770 mm/s Segment Timing: X0, X1, X2, X3 The first segment should have a duration that rotates the scroll one pack-length. The last segment should have a duration that advances the scroll one pocket pitch on the star-wheel. Again, we use the Gearing Ratio, G' in the equations. X0 = 0, X1 = 360/G = 360/8 = 45 ; X2 = 360(1-1/G) = 360*(1-1/8) = 315 ; X3 = 360. Y axis at X2 Edit the Position of X2 until the velocity profile increases steadily from the Start Velocity to the Final Velocity. |
|
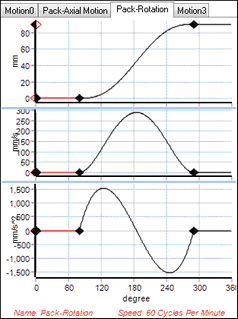
Pack Rotation The Pack rotates 90º as it moves from the entry to the exit of the scroll. The duration of the motion segment to rotate the pack is the same duration as the motion segment that increases its velocity.
|
|
 Step 5: Add the Feedscrew element
|
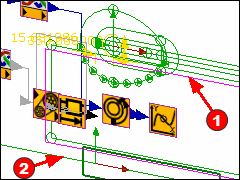
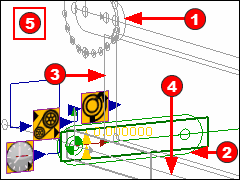
14.Click the Home key on your keyboard to make sure the MMA is at 0 15.Make sure 'Tools menu > Show other Part-Outlines and sketches' is active. 16.Rotate the view so you can see the elements in the two Mechanism-Editors. Remain in the Scroll Mechanism-Editor. 17.Click Add Scroll. |
|
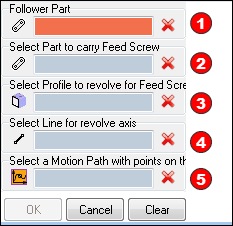
Select the five elements in order - see image above for the elements:
Click 'OK'.
|
|
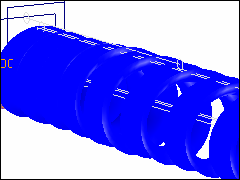
You may need to click the Model-Editor to force a full model rebuild. MechDesigner creates a surface for the part of the scroll that becomes in contact with the Pack, as the Pack advances.
|
 STEP 6: Transfer the Scroll to SOLIDWORKS
|
To transfer the Scroll to SOLIDWORKS, we need to edit the Scroll element. 1.Double-click the Scroll in the graphics-area or 1.Click the Scroll element in the graphics-area or the Assembly-Tree In the Selection-Window 2.Right-Click the Scroll-Element 3.Click 'Edit element' |
|
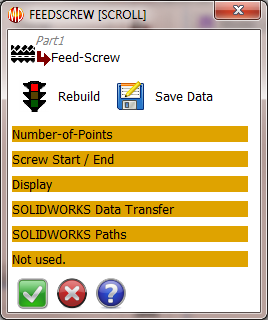
The Scroll Element dialog (Also called the Feed Screw - dialog). The important separators are: Number-of-Points •Edit the Number-of-Points along each Rim. •Typically 500 to 1500. Screw Start / End The Start and End of the feedscrew is with respect to the MMA. •Typically, set to 0 to 360 Display •color •Transparency - applies to view in the Model only •Show as Solid (Surface) and/or Rims check-boxes. |
|
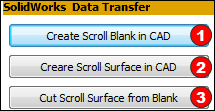
SOLIDWORKS Data Transfer separator: Start SOLIDWORKS, add a new Part, save the new Part. Now: in the SOLIDWORKS Data Transfer separator: 1.Click the 'Create Scroll Blank in CAD' 2.Click 'Create Scroll Surface in CAD' Commands |
 Troubleshoot SOLIDWORKS
|
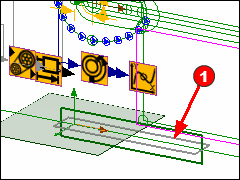
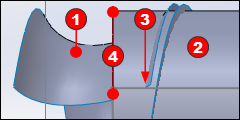
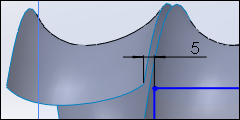
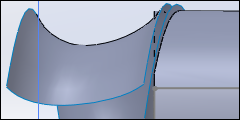
However, the last command: 'Cut Scroll Surface from Blank' CHECK 1: In SOLIDWORKS, inspect the 'left' face of the revolved Scroll Blank In the image to the left, the vertical line that is at the left of the Scroll-Blank In this case, the 'Cut Scroll Surface from Blank' (button |
|
You must, in SOLIDWORKS, or MechDesigner 1.Edit the sketch of the revolved Scroll-Blank I prefer to edit the sketch in SOLIDWORKS, rather than MechDesigner. |
|
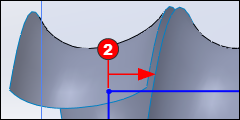
2.Move the end of the sketch to the right of the end of the Scroll-Surface. In this sketch, I have added a dimension between the end of the Scroll-Surface and the left of the Sketch-Blank. You do not need to add the dimension. To help me edit the sketch, I have, in SOLIDWORKS, dragged the 'Revolve' feature of the Scroll-Blank to below 'Feed-Screw Scroll Boundary-Surface' feature. |
|
Then, if I need to edit the sketch in the Revolve feature, I can see the end of the Scroll-Surface at the same time. |
|
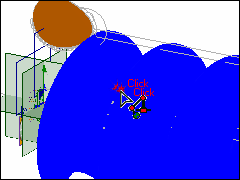
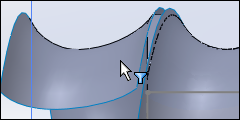
CHECK 2: After you close the sketch and rebuild the model. the Surface-Cut feature in SOLIDWORKS might not cut the correct side of the Scroll-Surface - see image to the left. |
|
In this case, in SOLIDWORKS: 1.Edit the Feed-Screw Scroll Boundary-Surface feature 2.Click the 'cut direction' arrow - see image - to reverse the direction of the Cut. |
|
In the image, you can see the revolved Scroll-Blank has been cut correctly by the Scroll-Surface. However, the Feed-Screw Scroll Boundary-Surface feature is still shown in the model |
|
CHECK 3: Hide the Feed-Screw Scroll Boundary-Surface feature. Use the shortcut-menu See image. |
|
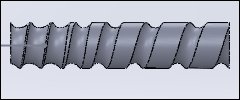
Finally, the scroll is correct. |
