Objective of Step 1.4:
To add a Pin-Joint. |
Terminology
Term : |
Description |
|---|---|
Pin-Joint : |
A joint that constrains two Parts to rotate relative to each other about a Point* in each Part. The technical kinematic terminology for a Pin-Joint is Revolute-Joint. Other terms are: Pivot-Point, Hinge-Point, ... * Point, start-Point, end-Point, center-point |
Video

Add a Pin-Joint
Add a Pin-Joint
|
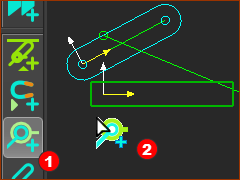
STEP 1: Start the Add Pin-Joint command
In the image we can see the: Add Pin-Joint command Mouse-pointer |
||||
|
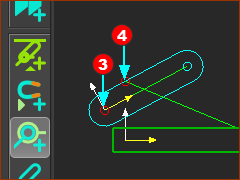
STEP 2: Add the Pin-Joint
Note
|
||||
|
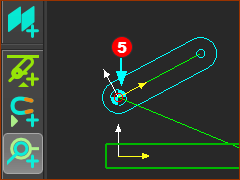
Result
STEP 3: Deselect the Add Pin-Joint command
Save your mechanism with CTRL+S |