 Three Editors
Editor Workspace:
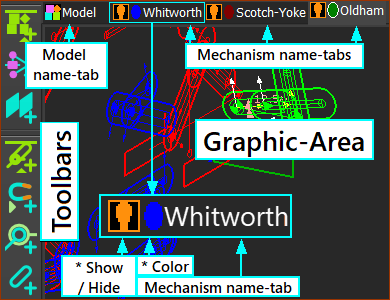
All three editor-types have the same workspace.
Graphics-Area : |
To add, view, select, and edit elements |
Contextual toolbars : |
Toolbars above, below, left, and right of the graphics-area to add elements that are contextual to each editor-type. |
Name-Tabs : |
Tabs to select the Model or different Mechanism-Editors. Each name-tab has a light-bulb and color icon. Right-click a name-tab for a shortcut menu: •Open memo - see 6: Memo •Show with "other kinematic and sketch-elements" (Light-Bulb) •Edit color of "other kinematic and sketch-elements" |
MODEL-EDITOR
When you start MechDesigner:
•we start a new project
•the Model-Editor is active
Model-Editor workspace
 Model-Editor workspace |
We show in the graphics-area of the new Model name-tab: 3 Planes: •Front Plane, Top Plane, and Right Planes Axes: •X–axis : Red-Arrow •Y–axis : Green-Arrow ( IMPORTANT : Gravity vector is down, in the direction of –ve Y-axis ) •Z–axis : Blue-Arrow You must use the Model-Editor to: •add a minimum of one Mechanism-Editor to a Plane You can use the Model-Editor to: •Add Planes, and add Mechanism-Editors to Planes •View MD-Solids and CAD-Solids in the model |
Model toolbar
The Model elements toolbar is to the left of the graphics-area.  Model toolbar |
MECHANISM-EDITOR
After you do the command Add Mechanism, you jump immediately to the new Mechanism-Editor tab and a new workspace.
Mechanism-Editor workspace
 Mechanism-Editor workspace |
Use Mechanism-Editors to build your machine model. Use the Mechanism-Editor (workspace) to add: •New Mechanisms (elements) •Parts, Joints, Gears, Cams, ... to build the kinematic-chains - the bones •Function-Blocks to plan how you want to move each kinematic-chain - the brain •Solids that are the flesh and skin on the bones •Springs to add external force functions - the muscles You can also analyze: •Kinematics : Linear/ Angular Position, Velocity, Acceleration of Parts and points •Kinetostatic : Force and Torques |
Mechanism-Editor toolbars
The contextual toolbars to a Mechanism-Editor are to the left, right, and above the graphics-area.
Modeling FB toolbar - above the graphics-area 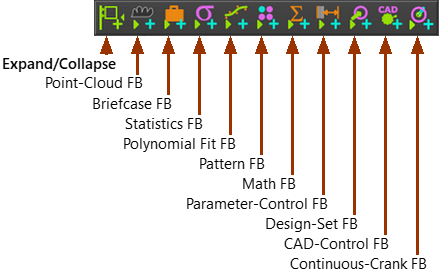 Solids toolbar - above the graphics-area 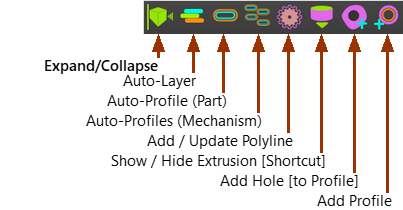 |
|
Kinematic-elements toolbar Left of Graphics-Area 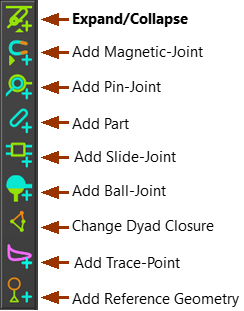 |
Kinematic-FB toolbar Right of Graphics-Area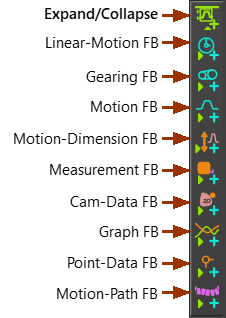 |
Machine-elements toolbar Left of Graphics-Area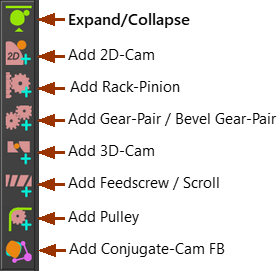 |
Forces toolbar Right of Graphics-Area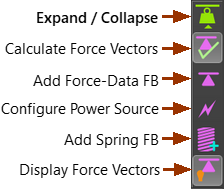 |
PART-EDITOR
You can edit, with the Part-Editor, any Part you have added to the Mechanism-Editor.
To edit a different Part, you must close the Part-Editor to return to the Mechanism-Editor, and then edit a different Part.
See also How to Start the Part-Editor
Part-Editor workspace
 Part-Editor workspace |
Use the Part-Editor to add: •Sketch-elements : Points, Lines, Arcs, Circles, Blend-Curves, Splines •Dimensions and constraints to or between sketch-elements Note: Constraints you add to a sketch-element show in the Selection-Window when you SHIFT-CLICK the sketch-element. |
Part-Editor toolbars
Geometry toolbar Left of Graphics-Area. 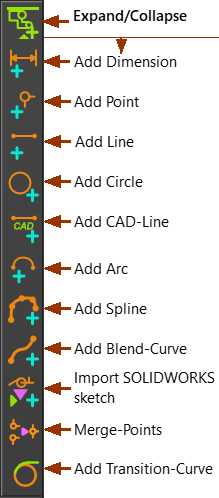 |
Constraints toolbar Right of Graphics-Area 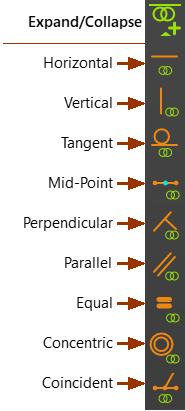 |