Trace-Point
Terminology:
Trace-Point : |
a Trace-Point shows the locus, or path, of a moving Point* relative to the Mechanism-Plane and Base-Part for one machine-cycle. |
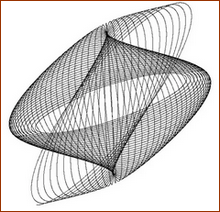
Coupler-Curve : |
An example of a Trace-Point. It shows the path of a Point on a Coupler of a 4-bar mechanism. The Coupler is the Part that is not connected to ground, it is usually between the end-Points of the Crank - the input-part - and the Rocker, Slider - the output-part. |
* Point, start-Point, end-Point, center-Point. |
|
|
Add Trace-Point
Add Trace-Point does NOT add a Point to your model.
To add a Trace-Point you must select a Point* that is already in your model.
* Point, start-Point, end-Point, center-Point, Motion-Point.
 Three example Trace-Points |
STEP 1:Start the Add Trace-Point command
The Command-Manager indicates you must select a Point* in the graphics-area. STEP 2:Click a Point
* Start-Point, End-Point, center-Point, Point, or Motion-Point |
|||||
STEP 3: Complete the command
The Trace-Point is now in the graphics-area. |
||||||
Video:

Video: Add Trace-Point
Add a Point to a Part, and drag the Point in the Mechanism-Editor:
Normally, when the Mechanism-Editor is active, you cannot drag a sketch-element.
However, as a special-case, you can move a Point** with a Trace-Point, if the Point does not have any constraints.
In this special case, it is easier to search for a “good” Trace-Point.
** not a start-Point, end-Point, center-Point or Motion-Point
Edit a Part In the Part-Editor: 1.Do Add Point Do not add a dimension or a constraint to the Point 2.Exit the Part-Editor In the Mechanism-Editor: 3.Do Add Trace-Point and select the Point 4.Drag the Point! Note: To make it easier to drag the Point: •Reduce the Number-of-Steps to ~60 - see Machine Setting dialog and / or •Drag the Point but do not lift your mouse-pointer until the Trace-Point also moves |
To add a Trace-Point of a Point relative to a moving Part
You must add a 2D-Cam, and show the Pitch-Center. In full: 1.Edit the Part with the Point whose locus you want to see relative to a moving Part. 2.Add a Circle, and add a Coincident constraint between the center-Point of the Circle and the Point. 3.Exit the Part-Editor 4.Add a Profile to the Circle Add 2D-Cam - you must select two elements: 5.Cam-Part: Select the Part in which you want to show the locus of the Point 6.Follower Profile: Select the Profile of the Circle To show the locus of the Point 7.Edit the 2D-Cam. 8.In 2D-Cam dialog > Display tab > Cam-Visibilities > Enable Pitch-Center. The locus of the Pitch-center is the locus and Trace-Point of the Point relative to the Cam-Part. |