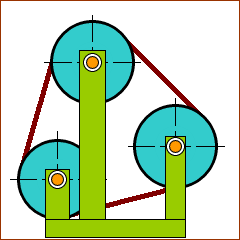
Belts and Pulleys
Tutorial Objectives:
To do Add Pulley for different Belt and Pulley systems.
 Pulley in MechDesigner |
 A Pulley in SOLIDWORKS |
 Image of a Pulley |
Terminology: Tutorial 17
Term : |
Definition |
|---|---|
Motion-Path FB : |
A function-block to add a Motion-Point to a sketch-path. Motion-values at the input-connector of the Motion-Path FB controls the motion of the Motion-Point along the sketch-path. The Motion-Path FB calculates, and can also control the length of the sketch-path (belt). You can edit the Tooth-Pitch of the Belt. |
Motion-Point : |
A Point that we constrain to move along a sketch-path. |
sketch-path : |
A sketch we add to a Part to control the path of a Belt. The sketch-path is usually closed (also called a sketch-loop). However, it can also be an open sketch-path - see sketch-path |
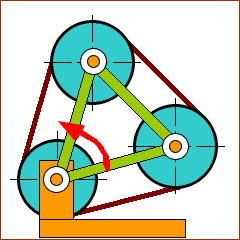
Driving-Pulley : |
The motion of a Driving-Pulley controls the motion of the Belt. You can add a minimum of zero(0), and a maximum of one(1) Driving-Pulley to each Belt. It is a Pulley you add to a rotating-Part that is kinematically-defined before you do Add Pulley. |
Driven-Pulley : |
The motion of a Belt controls the motion of a Driven-Pulley. The maximum number of Driven-Pulleys is equal to the number of arcs along the sketch-loop, that defines the path of a Belt (less one Arc if you also add a Driving-Pulley). It is a Pulley that you add to a rotating-Part that is not kinematically-defined before you do Add Pulley. |
Belt : |
We use the derived-name of Belt for the sketch-path when we relate the motion of a Motion-Point along the sketch-path to the motion of one or more Pulleys. |
Belt Tooth Pitch : |
The distance between each tooth on a Belt. |
![]() Belts and Pulleys
Belts and Pulleys